Showing posts with label Fitting. Show all posts

Monday, 18 January 2016

That was the year that was (the year of the trouser)

I've finally emerged scratched an battered from December's festivities. It's by far my favourite time of the year, though after a month of non-stop parties (and great company), I'll be grateful for any darkened or quiet rooms that might cross my path. People (even the ones you love dearly) are exhausting.

Somehow I managed to make a few Christmas gifts for the most discerning of loved ones:

Tap Shoe Bags
Tap shoe bags for 2 lovely teachers

Thread Theory Newcastle Cardigan Navy and Tan
A Thread Theory Newcastle Cardigan for B

2 Teddy Bears
2 teddy bears

2 Bird Ornaments
2 bird ornaments

Keep your eyes peeled in January (or maybe Feb at this rate) for a proper write up of the teddy bears and the Newcastle Cardigan, both of which were really engaging and rewarding projects.

tap shoe bag detail: lining and RSD tap shoes
More detail on the shoe bags

I also finished my last 2 pairs of trousers for the year at the tail end of November

Brown bootleg jeans

Rainbow trousers in a Liberty lawn fabric


The brown ones were a remake of Burda 10/2013 #126 Bootcut Trousers using my stamps fabric and a brown denim from Ditto Fabrics. I sized up to a 36 for this pair after my previous versions (34) were too tight. Again, still not bootcut!

The rainbow ones were a bit more special and deserve their own post in due course. I still have 2 pairs of "in progress" trousers waiting in the wings. I tried to dedicate a lot of time to trousers over 2015 and have learned a lot in doing so.

Firstly, I learned a lot of new things about fitting and patterns. Assuming that all clothes are some weird geometric 3D experiment, it's still mind boggling to imagine how a 2D alteration will affect the 3D garment once it's on a body. To that end, I'm still not sure why you'd ever need or want to make an adjustment to the crotch seam on a pair of trousers. A bit like my approach to armholes I guess: check the shoulder, the chest, the torso, but do not mess with the armhole unless you absolutely have to, and you know all of the follow-on corrections you'll have to do afterwards. With trousers it's best to check the wait, the hips, the height, the grain etc. I'd only want to directly mess with the crotch seam as a measure of last resort.

I've also learned a lot about finishing and detail, the factors that really make you feel like your project is a cut above everything else. A lot of this is RTW industry standards (it's one way to spend the tube commute) and expectations for trouser styles. This is the really nerdy stuff about reinforcements/bar tacks, where the top-stitching goes, appropriate pocket styles etc. I'm all about making it look as good as it can be. Part of the general trepidation about sewing trousers is probably based around the finishing and making them look "real" (and not like a pair of clownish pyjamas), moreso than just fitting.

Anyway, that was the year of the trouser.

I'm clearing out my textiles at the moment ready for 2016's theme. It's been really useful to look at RTW, me-mades and fabric stash all as the same thing for once. The holistic approach is going to be my guide for the year ahead. 2016 will be the year of the outfit.

My making usually takes on a bit of a delay between inspiration and finished item. The stuff I found really exciting and inspiritng in November should (hopefully) be ready before the end of March. And you know, some of that is pretty flashy and challenging. If I only make that stuff then pretty quickly I'd have no underpants or pyjamas. You know?

I liked making nothing but trousers for 3 months. I liked production-lining wrap skirts (it was efficient!) but it's time for a different approach because my old RTWs are slowly wearing out and the projects that were "just about good enough" aren't getting chucked out when they should really go.

Thinking in terms of whole outfits will (hopefully) mean I can balance the fun with the sensible and really make sure that professional/officewear is fit for purpose too. You see, I want to dress in a very specific way at work. I want my bosses to think I'm valuable so I want to dress like I'm valuable. It's cheeky- but why not.

2016 is shaping up to have some interesting sewing challenges ahead: more little'uns, more softies, more gifts, more garments, more pants.

K

Friday, 13 November 2015

Working backwards from the answer

Do you remember in school where the answers to all the exercises were stashed in the back of the maths textbook? Peeking was frowned upon because if you followed the right steps in the right process, you'd get the right answer anyway.

One of the things I'm learning (rather cynically) is that sometimes it's good to start with the answer you want to see and work backwards do decide how you can get there. Knowing the answer can help you to choose the right process, and the right steps to achieve it.

Why should I try out a pile of unknown trouser patterns (choosing the process without knowing anything about the answer) when there are a few items already in my wardrobe that I'd consider to be the answer that I want to see? This might be a good way of taking out some of the mystery of more complex garments. I'd love to be able to copy them and just make endless repeats of the ones that work. I have had a particular pair of jeans a long time and they've finally worn out. I like the length, the fit and the size of the pockets. They don't have any darts and the grainline is quite visible after so much wear. I thought they'd be a good starter for my first RTW copy. I took a lot of the copying principles from Kenneth King's Craftsy class, Jeanius, though really wasn't keen to follow him to the letter. I used muslin, not organza; tracing paper, not carbon paper; and did a lot of marking in Frixion pen.


Original Front
Original Back

Once all the information was copied from jeans to muslin to paper, I threw it in the laundry and had a blank canvas muslin ready to copy a new item.

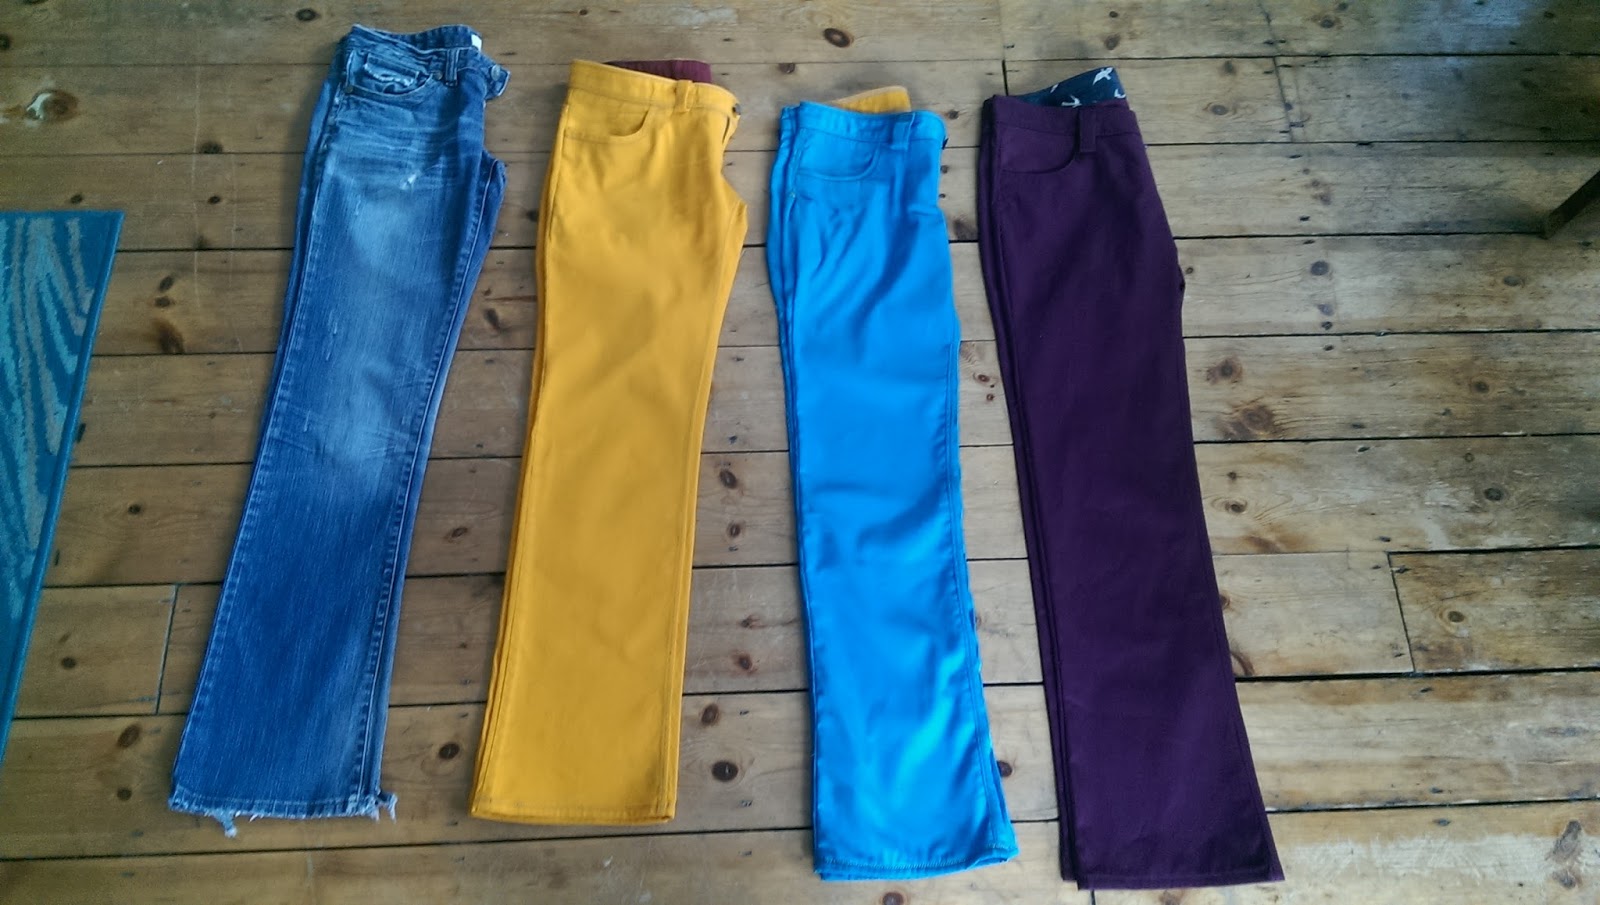
Version 1: Yellow Seagull Jeans
Despite their beauty, these jeans came up 2 inches too big in the waist. There is also some rumpling in the back thigh.

Version 1 Front
Version 1 Back


Version 2: Sky Blue Octopus Jeans
I compared the V1 pattern to the original jeans. The waistband was too big and the yoke pieces were slightly too big as well. I reduced the side seam above the hip and slashed the yoke to curve it more (which would in turn reduce the waistband by 2 inches).

The fabric is less stiff than the yellow pair, so some twisting and rumpling occurred during the execution, which shows all the way down the back of the leg. I think this compounded any issues that appeared in Version 1.

Here the waistband ended up slightly smaller than expected and the jeans ended up slightly too small all over. Bear in mind that all the adjustments were above hip level. By curving the yoke to reduce the top edge, I think I took a lot of space out of my backside that I really needed to have! Although these are low-rise jeans, they cause quite a few wedgies!

This also had an effect lower down where the outline of my pockets were visible through the front!. I clawed back some space through the seam allowances but it didn't fix the back.
Version 2 Front
Pocket outline on my right thigh (because it's bigger than the left one for some reason)
Version 2 Back

Version 3: Mulberry Seagull Jeans
I put the yoke back to its original shape. Now, Kenneth King's Jeanius doesn't cover copying waistbands at all. The message from the lecture is "don't worry about it, a waistband is just a long thin rectangle - ignore the one on the garment and draft a suitably sized rectangle". I believed him at first, then I did some snooping and pondering. Then I smelled bullshit.

Correcting the yoke
After looking closely at the waistband on the original, I spotted the grainline is different between the front and the back. This shouldn't happen if it's a basic rectangle, should it? Measured the top and the bottom edges of the original waistband again. One edge is 34" and one is 35.5". Aha, I'm betting the curve in the waistband is quite important.

This bet is for 3 reasons:
  1. I have quite a curvy back, so rectangular waistbands often sit a little funny, even if they are the right size.
  2. Ignoring the rise of these jeans, the difference between my waist and hip measurements is about 10". The distance between waist and hip is about 9"-10", so anything that sits on the body between waist and hip could be curved to match the change in shape more effectively.
  3. I've seen some pattern cutters argue about matching curves, and more heavy interfaced parts of a garment "pushing" the regular bits around (Patterncutter206 has this video and this video on shirt collars which is relevant, Catina on PatternReview is also a mine of information and ideas) which seems very applicable in this case.
Adjusted curvy waistband
Staying on the idea of matching curves - look at how the front two pieces align without a waistband:

Curvy front pieces
Surely a straight piece of fabric is just totally inappropriate?

Anyway, this is the finished set of version 3:

Version 3 Front
Version 3 Back
Those of you still with me will see the back wrinkles are still there. I reckon that this is mostly linked to the length of the leg and drape of the fabric. I like my trousers long, but when barefoot they will meet the floor before my feet do. The sturdy fabric rumples all the way up the back of the leg, whereas a drapier fabric might pool on the floor. This is what happens when I turn up the cuffs:

Version 3 Back (when they're not too long)
Better! Though you still need to discount the wearing wrinkles. Voila!

This effect will probably be cancelled out after some real-world wear. If you look again at the original jeans, the back heel has been worn out so the legs won't rumple. The fabric will also probably shrink very slightly over time. Wearing shoes and wearing the jeans at different heights will also have an effect on how much excess length there is in the leg.

I'm finally happy with these jeans and the pattern - I can finally throw away the old pair away and use this as a good pattern to churn out jeans. Copying RTW is also quite addictive, I have a shirt and some more trousers in line ready to make up as well. These have some more interesting details (like darts) and it might take some time to get them right. You'll probably see some updates soon. In the meantime, I'll do some posts on the detail and finishing on these jeans shortly.


Take care for now,
K

Monday, 9 November 2015

Fitting - Janet and Kaisla


Hey y'all,

I've been working on fitting recently, a large part of this learning curve was coming to terms with the iterative nature of fitting and the fact that (despite what THEY tell you) it's a very subjective assessment. All of the expertise in the world is no match for a basic preference from garment to garment.

I'm developing an almost unerring faith in patterns - if the paper is right, the seams will match up. If the paper is right, it'll hang correctly. If the paper is right I will be able to move unrestricted.

I'm also very aware that fitting is an alien and scary process to people, both makers and non-makers. Have you ever had that thought that something isn’t right with your clothes, but you're not sure what? Have you ever tried to explain to the parcel delivery guy why you're stood in your lounge in your bra, tissue paper and covered in pins? Have you ever gone straight for something in your size only to find out it looks awful. Probably all to do with fitting. In one recent muslin session my housemate passed by and commented "That's a really interesting peekaboo effect, what's it going to look like on the final one?" - before having her hopes sadly dashed by the reality that we're just making extra space for lumpy bits.

With that in mind, I thought it would be useful to share some recent adjustments and the rationale behind them.

Janet
I used the bodice of the first Janet dress to make several new dresses, but over time I realised the fit was really off. This second time around I've gone a bit freestyle with transferring adjustments to the flat pattern from the muslin. I'm trying to stick to vertical and horizontal adjustments wherever possible because they're easier to understand and keep track of. No FBAs, diagonal lines or adding random darts for me. I also try to minimise any changes to the actual seamlines - slash and spread as they say.

I suppose the main things I had to do to the pattern was to adjust for rounded shoulders, a narrow swayback  and (amazingly) an adjustment to the upper chest.

 A lot of these adjustments seemed to just be moving shaping out of one place and moving it to another. It seems silly but a couple of significant changes in fabric actually cancelled each other out on paper!

I've done some sketches to show  how I interpreted a few of the fitting issues and justified a few of the adjustments.

Rounded shoulders and sloping shoulders


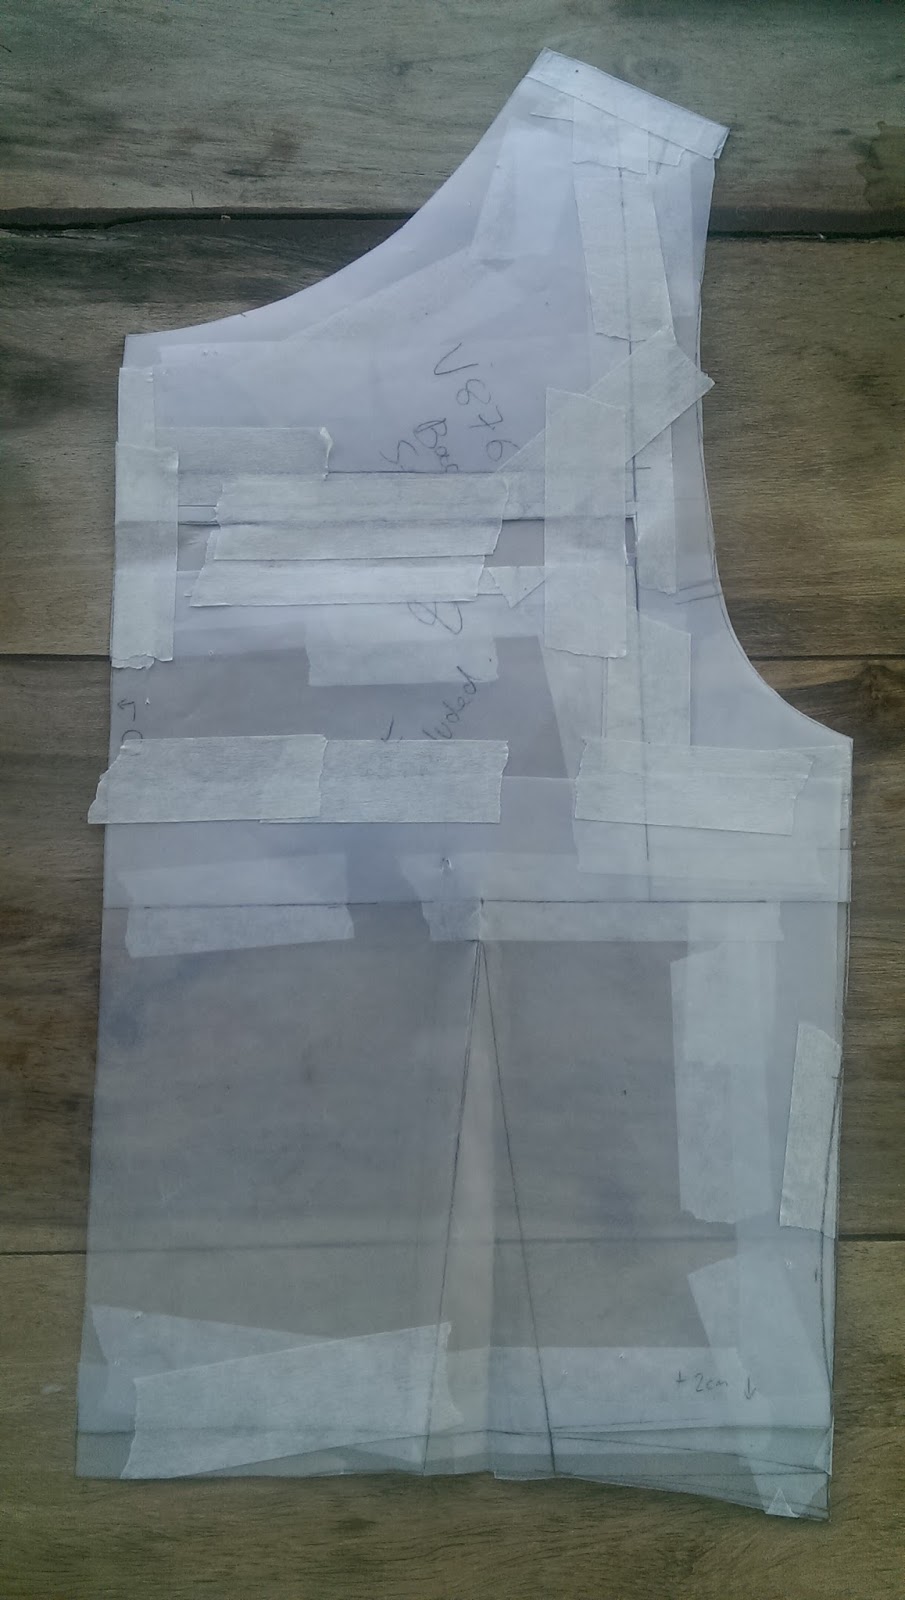
Okay, so I needed to add length at the upper back in the centre, and I needed to raise the inner edge of the shoulder so it slopes more. I squared across from the centre back (CB) to halfway along the shoulder, then raised it until the slope was correct.

This still wasn't enough space at CB, so one the first adjustment was taped up, I cut slightly below it and I extended the vertical line down into the side seam and added more space at CB as appropriate.


Swayback adjustment   
When the pattern was straight out of the packet, there was some excess fabric in the small of my back. By making the adjustment above to the muslin, this was made WAY more extreme.  What I need to do here was remove fabric so the waist hits the correct place. The amount taken out would integrate the shortened body and and the swayback issue.

Apparently my only photo of this is when it had been taped up again. See the horizontal line below the armhole? There you go!

 
Upper chest adjustment - Front
Very similar to the adjustment I made to the back. My cup size was about right or a little small for the pattern. I split the length added across a sloping shoulder and a side seam below the armhole.


Below are some fast and dirty muslin shots - after almost all the fitting tweaks had been adjusted. The only thing left is that it was too long:


Kaisla
These adjustments were really minor, the sleeve wasn't long enough, the shoulders needed a tiny adjustment after adding shoulder pads, the swayback issue is exactly the same as above. B helpfully pinned the muslin and it really visibly changes the drape of the jacket.


Above is the jacket straight out of the packet with no adjustments. You can see the top of the shoulder is collapsing a bit, and the middle at the back is a bit flouffy. At first it looked like we could fix it by taking some vertical room outside up the princess seams (like vertical waist darts). Didn't fix it.


Here you can see the tiny shoulder adjustment, as well as the actual fix for my swayback. Take out a horizontal amount, above the visible problem area. This is level with the base of my shoulder blades.


See how much better that looks? And you know the rest of how the Kaisla turned out.

I have also been working on fitting some jeans too. Once V3 is made up, you'll get a writeup.

K. x.