Yes, mainly for me.
What do you mean other people might want jackets?
This one took me about 6 weeks to complete and for some reason I kept a log of what I was planning to do each day, and if I got it done. I also tried to keep a few notes on construction and some observations. Writing it down helped me to keep peace of mind when it felt like I hadn't made enough progress. With hindsight, it's also a useful record of that familiar descent into a project spiraling out of control.
Why?
It all started on Pinterest with a Desigual jacket. Or maybe it was on the streets with trendy tapestry coats. Or maybe it was Emma One Sock's Black Friday sale. In any case, I had an idea and I needed to make something "proper".The theory behind this coat was that I wanted it to look super fancy. I wanted to feel super fancy in something I'd made - but, crucially, it needed to be functional as well as beautiful. Each time I go to a fancy event, and have a fancy me-made dress, I feel like it is let down by my ubiquitous red backpack and black North Face 3-in-1. Or I freeze in a daft cardi. So I needed something:
- Super fancy and able to coordinate with fancy outfits
- With good pockets so I won't need to carry a bag
- Takes the place of a coat/jacket in situations where I wouldn't be wearing as much as usual
I had this idea for a long time and didn't start with an actual deadline in mind. But, as is the normal way, one showed up part-way through the make. Some dear friends invited us to their wedding. It could be ready in time, couldn't it? Its worth a try to get it ready in time, isn't it?
The Pattern
The pattern is Burda 6875, bought about a year ago as a result of this PatternReview thread. I was on a slim collar jacket kick at the time. I appreciated the notched collar and other details. During construction I realised there were some details I didn't like:- The way the vents were finished (lots of hand stitching and maybe a raw edge)
- The construction of the front piece seemed a little counter-intuitive and less robust than it could be.
 |
| Muslin for Burda 6875. Shows the difference between the pocket styles. I'm glad I tested it. |
 |
| And the finished deal, with pocket flaps |
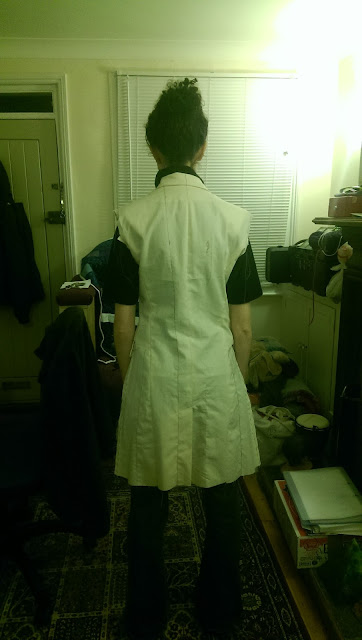
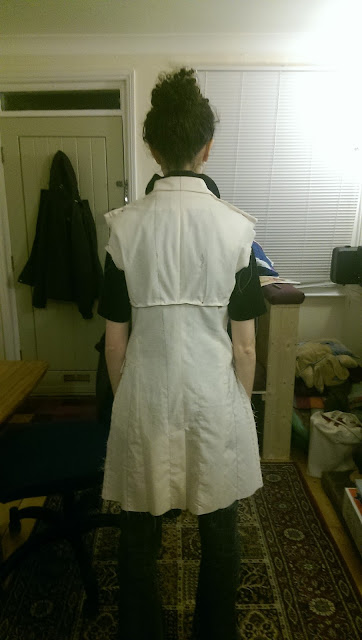
I normally fit a Burda size 34 or 36 pretty readily, so was prepared to make some minor adjustments. I made the size 34 muslin with no prior adjustments and (unsurprisingly) decided that shoulder slope and the back length would need modifications. As per my Kaisla blazer. I hope it helped.
With hindsight, though this was the right size, I should have gone one larger to account for fabric bulk and interlining.
 |
| Straight from the packet |
 |
| Pinned alterations |
 |
| Final jacket fit - I'm not sure why the jacket is swerving to the side. Bit worried now. |
With hindsight though, this may have been overzealous - Filling the pockets makes me wider, like Marge Simpson at the candy convention. The capacity of my pockets is now much larger than I am prepared to become. I also have to pat myself down every so often to find out where I have put my stuff.
I should have seen this coming. Any regrets? Of course not.
B commented that the pocket flaps might be overkill. These are perfectly nice double welts without adding in a fancy pocket flap. Any thoughts?
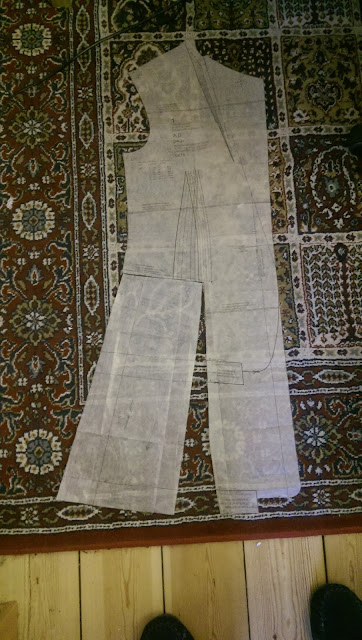
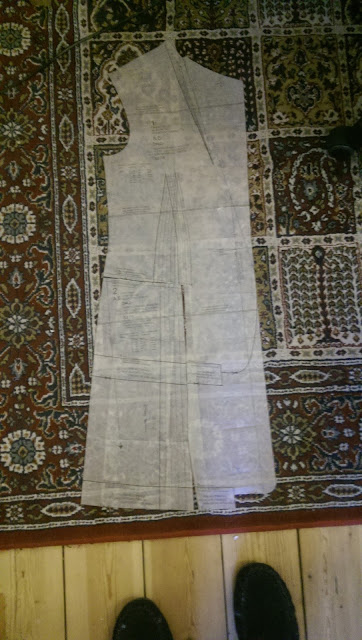
One big problem I had with the pattern is that it has a piece - the Lower Side Front piece - which is a real pain. No obvious notches or markings to show which way it should be sewn, and reasonable arguments for the grainline to point in 2 different directions. Maybe it would have never been an issue if I spent more time with Big 4 patterns, but let this be a cautionary note to anyone working on v6875.
I think this is incorrect:
I think this is correct:
I know it looks obvious when you know the answer, but trust me when I say it gets confusing, especially if your fabrics don't have an obvious right side/wrong side or a print to give you a clue.
The Fabric
I specifically bought the outer fabric, but tried to get the rest of the materials from my stash. In the end a lot of choices were made because there was only one thing that worked with everything else. You can kind of tell, given the history of some of the bits in this section!Outer
From EmmaOneSock's Black Friday Sale, but somehow from an English mill. Mix of polyester, silk and cotton. The fabric is a jacquard/brocade with grey/white flowers woven into a variegated background. I suspect it might be factory seconds as the flower detail is a bit mangled in sections, like they hadn't perfected the weaving pattern. But that's one of the things that makes it interesting. I used up the last of my Guterman 4888 thread on this fabric and REALLY need to find more!
This has a lot of bounce and a lot of texture. It's beautiful but it didn't behave. It frays and shrinks and expands. It doesn't take an iron well - I learned my lesson after accidentally burning it, but I also had to leave every pressed seam to cool under a piece of wood. In my notes it says that the fabric hates: irons, pins, needles, scissors, fusible interfacing and being handled.
 |
| Melted bit |
 |
| Improvised clappers |
Lining
Pure red silk. I wasn't being deliberately decadent, but that was the best candidate out of the cupboard. Originally from March 2016 and the Scrap Lace Dress. And there was enough left for the body lining in the jacket. Ooooh, it is luxurious against the skin.
Sleeve Lining
I got this last year in Tokyo in one of the very cheap bundles. Not sure of the content, but it was good and slippery (which is what you want in a sleeve lining).
Interfacing
General purpose fusible interfacing (woven) from MacCulloch & Wallis. I have a stock of this stuff as it's my preferred fusible interfacing. The outer fabric HATED this and kept coming away, but it has held relatively well. I probably shouldn't have forced fusing on the fabric, oh well. The shoulder pads also came from MacCulloch & Wallis, though they are quite tall - I wonder if it would have been better to get a different size/height. That being said, they are good quality so should last for a long time.
 |
| A look at a jacket front and one of the pockets |
Interlining 1
The main body is interlined with some brushed viscose I got from EmmaOneSock. I got the fabric at the same time as the outer fabric, but it was reserved for a pair of trousers (yet to be blogged). It was the best candidate for interlining so I just managed to squeeze it out of the yardage, without jeopardizing the trousers (too much). It is incredibly soft and quite cosy.
With hindsight (or with more time), I should have trimmed the interlining or accounted for the bulk at the back pleat. It causes a little bobble now at the nape of my neck, which I did try to cut out, but it should have been either pleated out or stitched down, or underneath a shoulder stay. Oh well.
Interlining 2
I interlined the upper sleeve for warmth using some very old cotton flannel from my scraps. The vendor was probably fabric.com. I think I got this when making Christmas gifts in 2012 and I used the darker blue one for PJs for P. Lord knows what happened to the lighter stuff. I read on Fashion Incubator that it's common to line the upper sleeve and not the lower one, though I've never taken a coat apart to find out. So only the upper sleeve is interlined. I also improvised a sleeve head roll from some scrap batting. I should get some proper ones for my next coat.
Accents
The cuff buttons are from La Mercerie du Bain aux Plantes, Strasbourg. The centre-front buttons are from MacCulloch & Wallis, spares from Newcastle v2. The cherry lining is Liberty or faux-Liberty from Classic Textiles in Goldhawk Road.
 |
| Cuff buttons |
The Construction
This topped out at roughly 120 pieces.You know I mentioned earlier that jackets take a long time? That's why.
Leggings are 2 pieces, a t-shirt is typically 5 pieces, and a button-down shirt could be about 20 pieces. But things start to add up really quickly. And when they're large pieces that need proper handling then the time and attention needed just continues to rise.
Looking back at my notes, I'm never convinced that it'll get done. Extra steps unpack themselves from "Oh, I'll just..." to "that means X, then Y, then Z and I'll have to trim and press everything before doing the second side".
This came at a time when I was super-busy at work and studying for some project management qualifications. Something like that always seems to happen. Things ramp up at work and in response I over-commit my spare time - a tiny act of defiance that leaves crazy achievements in its wake. It's oddly satisfying sometimes, scratching a creative itch that can't be touched when you're making stuff at leisure. On the other hand, I was not able to think about the project by the end. I could not hold several steps in my head, and I couldn't work out smart ways of sewing pieces together. This is where the notes came in handy because there I could write something down without having to remember it, and there wasn't so much thinking when I needed to be doing.
But it got done. Somehow. I was a nervous wreck but it got done. I was egged on by B and some friends, none of whom have expressed any remorse at having done so. That's what happens when you have friends who also make things. Cruel friends who also make things.
The sleeves and cuffs were the main source of last minute panics. Never neglect your sleeves. I couldn't handle the cognitive load of machine sewing the sleeve lining to the cuffs (This image from the tutorial on bagging a jacket lining by Grainline Studios is a good illustration of why it is so complicated) so I clumsily took a hand needle to the task. I've done it by machine before, I really like that method, but it wasn't happening that evening.
With time running out, I folded the sleeve vents over and stitched them down to the lining. Not as good as it could be, but it was done. But this is The Year of Doing Things Properly, and my brain decided that wasn't good enough. They weren't right. B advised a I sleep on the problem (sure that I'd forget about it soon enough) but I spent a full day raving that the cuffs weren't right to anyone who would listen. I had less time than sense but they had to change. Every jacket I saw in London that day had mitred sleeve vents, and somehow it became a big deal. My coat had to have mitred sleeve vents as well.
If you're wondering what a mitred vent is, this image from esewingworksop has a good illustration. You can see them fairly frequently on jacket sleeves, jacket hems and on straight or pencil skirts
Anyway, I took apart the sleeves and launched into the corner seams, trimming as needed, when suddenly:
"B, It's gone wrong"
"mmm" *doesn't look up from the laptop*
"No really B...this is catastrophically wrong"
"oh no" *attention still fixed on the laptop*
Fabric where there shouldn't be, and no fabric where there should be. I sliced the cuff the wrong way. At this point either it got fixed, or I had to replace the whole sleeve. One of those options meant the jacket wouldn't make it to the wedding. At this point B is still unfazed - he's heard me whine about projects too many times before.
So I guess I fixed it.
But you won't see a photo here - you'll have to see the jacket and find the scar in real life.
The moral: respect your sleeves.
I do love this coat, but it is more fancy and more fragile than I had anticipated. The original plan was for it to be machine washable, but given the behaviour of the outer fabric, I don't trust it at all. So it has spent a lot of time under a dust cover recently. Plus I'm afraid writing about it may have taken longer than it took to make the coat!
K


