Updated and republished post to include the link to the dress.
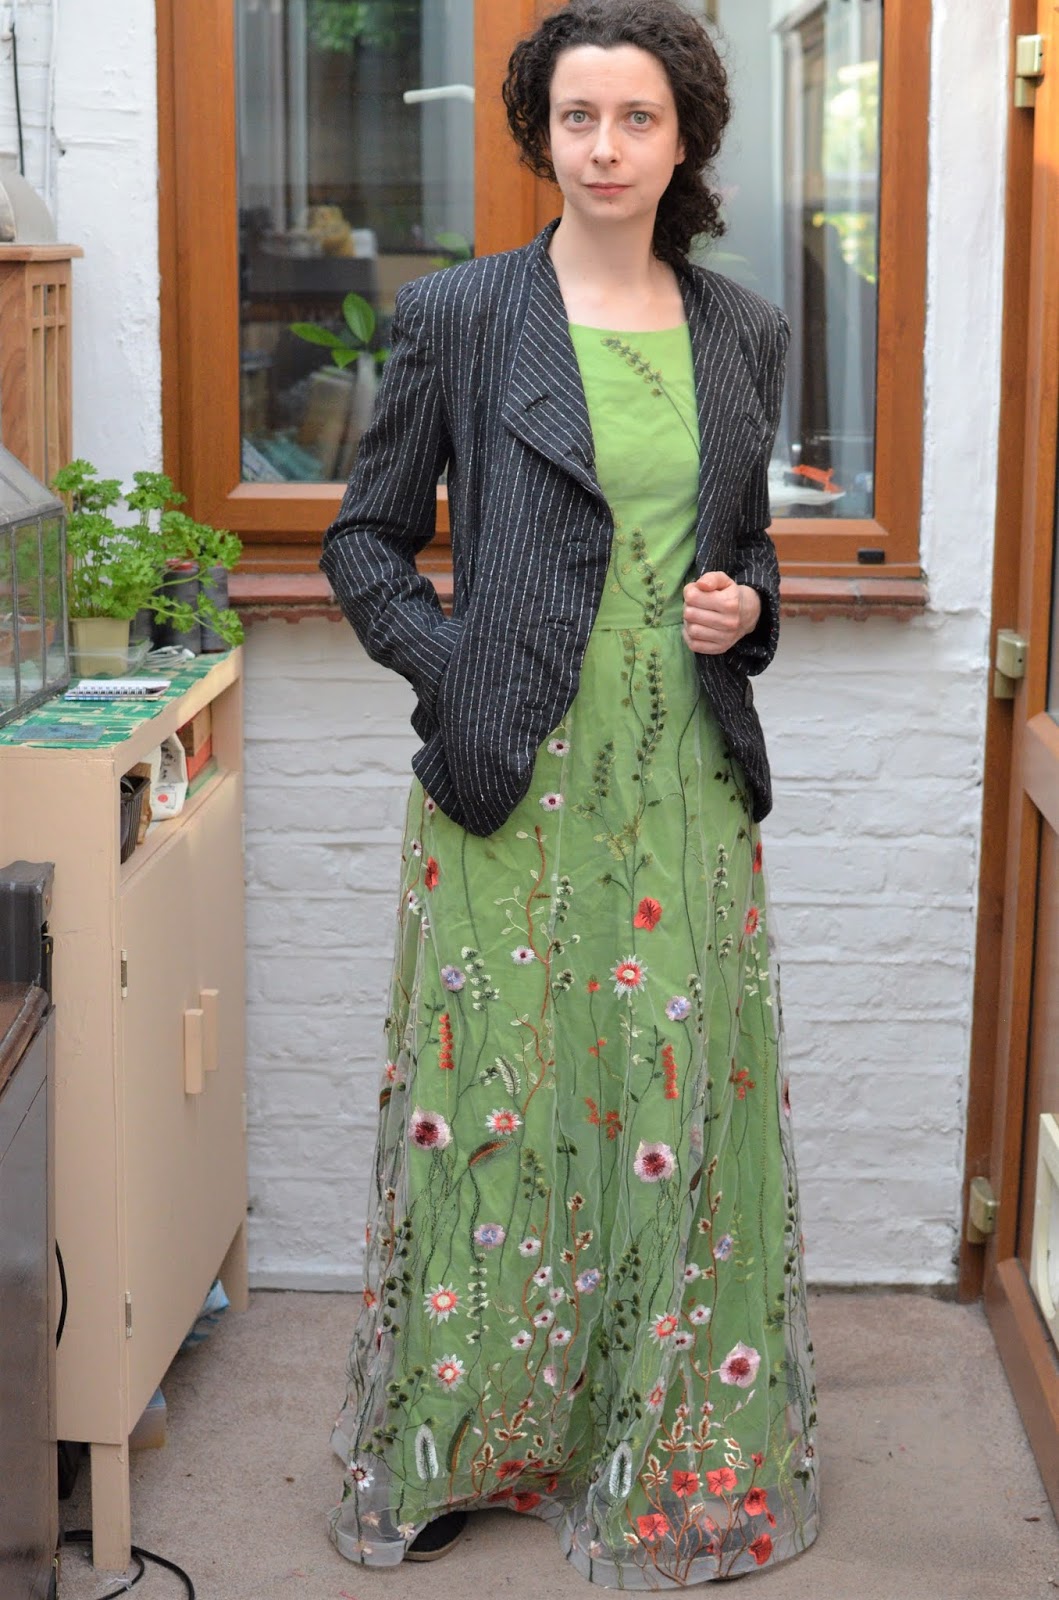
The Jacket
The story of this jacket's inception is almost the opposite of the dress. While the dress was created for the event and became a reference to the theatre show, the jacket was directly inspired by the show and accidentally became part of the outfit. I had coveted the Burdastyle Crossover Jacket since its launch - I dread to think how many times I'd Googled it and checked for other internet versions. I also bought the pattern, printed it and cut out size 36 before leaving it in an envelope for 2+ years.Having waited so long before attempting to make it, I had spotted some of the issues with the pattern in other people's reviews. Some of the important elements to flag were:
- Sleeves needing a lot of care and attention to insert without visible gathering at the head
- It only really looks good in photos when it's partially buttoned.
- Two layer jacket - it has no facing/lining. Rather, all of the inside is made up of the same fabric
- Sleeve seam shaping and the long sleeve vent - most people had puckers/dimples at the elbow where the vent becomes the seam.


I'm trying to remember how this jacket got started. You remember how I fell in love with Hades' glittery pinstripes, I was determined to find the fabric. Well, I fell short but I did find a beautiful reasonably priced pinstripe on Fabworks. While I coveted it as the closest possible thing to the sparkly Hades fabric, I think it took me a few days to marry the fabric to the pattern in my head. It's a virgin wool, with some elastane built in. Interestingly, it is definitely a charcoal grey (not black) as I trialled about a dozen threads for it. I know it isn't glittery, but the slubby effect of the pinstripes does reference how they should glimmer. Besides, I told myself, I could just stitch in glittery lines on the jacket with some iridescent thread. It is a gem of a fabric, I love it so much.
Once I got it and started work, the first thing to do was to cut out the pattern pieces and start stitching in glittery lines on each pattern piece. I made slow progress for about 4 days and then gave up. However, I was too lazy to rip it out so there's still a hint of sparkliness on the front of the jacket.
Then I needed to to line up all of the stripes and make all of the bound buttonholes. Now, I've never done them before and while I knew they were basically welts, I wasn't sure about the finishing steps. I looked up some tutorials before attempting them, given that the jacket requires so many of them. They worked out okay, although I made a lot of effort to match the welt/lip stipes with the surrounding jacket, and I think that was only a partial success. This was my first time doing bound buttonholes, so I'll take them.
The lining is made from blue charmeuse and some turquiose bemberg. They were both in my stash at the time of cutting out the fabric - I don't think there's any more profound reasoning to the fabric choice. I think it looks really good with the pinstirpe (red is more common?), and I had some Nani Iro bias binding in my stash too which makes a fun accent between the lining/facing.


I made no fitting adjustments (because I'm lazy) but did alter the pattern to have a facing on the front, and around the sleeve cuffs.I should have done a Small Bust Adjustment, but didn't. It should be a learning point for me to refit every single jacket I make (even if it's a TNT) - they are so variable.

Finding buttons was a nightmare. I toured M&W, Fan New Trimmings and John Lewis looking for suitable candidates. I spent an hour in John Lewis with 2 viable candidates and then settled on these because they were sufficiently busy to blend with the jacket from a distance. They also came in two sizes, which was helpful because the pattern calls for the cuff buttons to be slightly smaller than the front ones. I bought extra (for repairs) but ended up using an extra button on each of the cuffs, because it filled the space better. So I have 6 buttons on each cuff when the pattern only calls for 5. The cuffs are interesting because the buttonhole is one big welt, and you hand-stitch the lips together at intervals, creating space for individual buttons. I've just remembered the buttons cost me £28 (twenty eight quid!) total. That was definitely bruising.
You will see that I failed to insert the sleeves without puckers. I seem to have this recurrent problem with jacket sleeves, no other garment sleeves pucker! They were ripped out and reinserted several times and settled for this. I did add shoulder pads and sleeve head roll, but the jacket looked awful. I removed the sleeve roll and kept the shoulder pads, tacking them only at the princess seams. This is another recurrent problem with jacket shoulders - the more I try to anchor them securely into place with lots of stitching, the worse they look.


Working on this pattern revealed a few more issues which might be interesting for people thinking of making the jacket:
- The pockets (or their seam allowance) might get in the way of the jacket centre front seam. They really don't have much space.
- My notes say "WTF sleeve vent pattern" - I remember it being counter-intuitive, and I think I redrafted my own. Be prepared for that to be confusing
I would like to find a way of incorporating a feather motif in the jacket the future, but haven't worked that out yet. I got some iron-on feather patches from the Dior exhibition at the V&A in 2019, but they're not quite right for this.
I am utterly surprised at how much I've worn this jacket since I made it. It's a pretty common work attire piece and I found that it works really well in the winter months (it fits nicely under my Mei jacket). It provides more warmth/wind resistance that I would have expected from such a thin fabric.On the other hand, I have never ever worn it with the buttons undone or sleeves rolled up. Seems odd, given that the cuffs are the man design feature, no?
The Outfit
Unexpectedly, I finished the outfit with a day to spare. I toyed with the idea of making a custom bag, but decided against it. Conveniently, I had a bag already that's printed with vintage microphones which nicely references 'Why We Build the Wall', and I paired it with my Aussie Pink Floyd The Wall pin badge just to hammer the point home.I had planned to debut the hat from my Summer 2019 millinery course, but there were some problems. Instead I used my standard sunhat and switched out the trim to match the Persephone Dress.

We were in full heatwave at the time and I knew that our day by the river was going to be hotter than hell. The jacket lasted approx 90 minutes on the day before being bundled in the bag, but the dress held up very well.
Ultimately I don't think anyone really noticed/cared about the dress in great measure. I don't remember if there were any compliments on it (it was noisy and the Pimms flowed freely). I am pleased I didn't stick out like a sore thumb. But in my head, on the day, I was utterly bulletproof. Smug. Chest puffed out. Striding around between the ice cream van/deck chairs/afternoon tea. Sure, there probably were a few more handmade outfits on the riverbank, and I couldn't tell one blazer from the next. But no one else at that event, under the blazing sun, was dressed simultaneously as the lord of the underworld and the goddess of summer. And that, I'll take as a win.
K


