Tuesday 10 September 2019

Fast and Furious Projects

This is a quick rundown of recent projects which really don't merit their own posts. I've got a little bit to say about each of them but not really enough detail or images to justify a lot of effot.

Burda Stripe Cowls

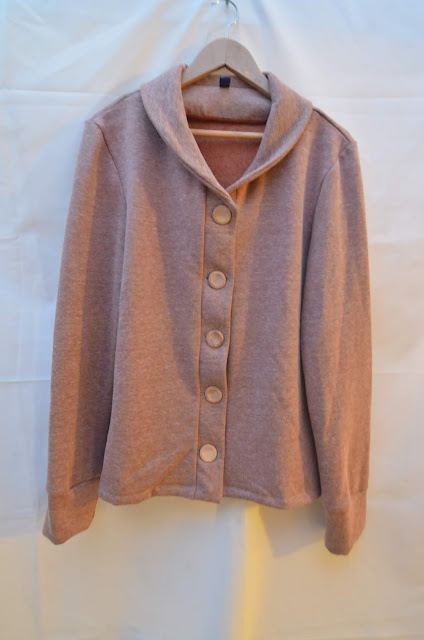
You remember the Winston Jumper? Well I pulled together the scrap fabric to make a second one (with slightly different sleeves) following some slightly more normal proportions. This fabric is prone to stretch and creep out so I found the extra-long body and sleeves on the original Winston to be quite irritating. I ended up shortening them on the original too.


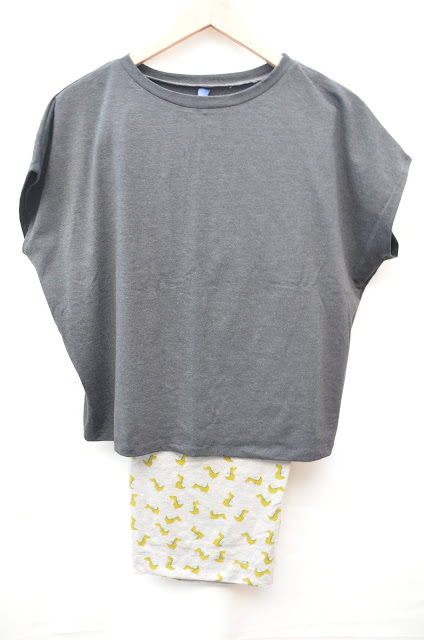
Full-length Leggings

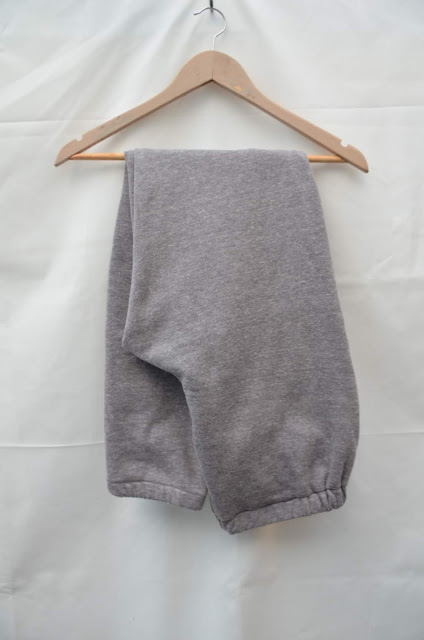
This was more on experiment-cum-speed trial. Sometime during the autumn I decided that I hated the current capri length on ALL of my leggings and that full-length was the only real way togo. So I threw these together. They're a bit tall and the waistband isn't particularly snug but I'm not complaining. They're a fun change for dance practice.

I experimented a bit on the lower leg with seamlines. It may evolve for future makes but right now I'm overstocked on leggings.


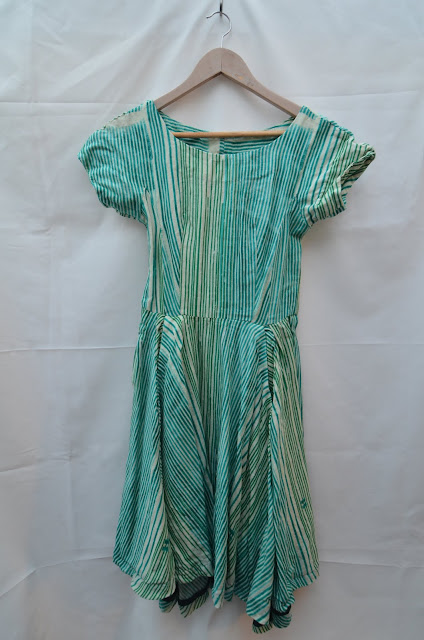
Pop-Art dress revisited.

My mod dress has finally become too scanadlously short to wear. I added some fabric as a hem band and am hopingto get a few more wears out of it. I'm pleased I kep the spare fabric for so long - it is an absolute beauty. I've never seen anything else like it.

This is part of my attempts to alter/repair more. My Lizzie dress is also getting too short and I'm hoping to do a bit of surgery to make it longer - though there is absolutely no spare fabric for this one.


Gift Dresses

Way back in May 2018 I made some dresses for a friend as birthday gift. I copied some existing garments and hoped they would work nicely. One dress is made from Atelier Brunette Moonstone Viscose, the other is a ponte (?) from Girl Charlee UK. They arrived with the recipient just before the crazy heatwave. Hopefully it was easy to wear in the summer heat.

One of the interesting things about copying the garments for pattern pieces was making discoveries as the process developed. I started out thinking one skirt was a basic rectangle, but it had sneaky curves and shaping hidden in the seamlines!

Twist & Drape Shirt

How many times have I made this pattern? Well, hopefully this time I haven't gotten it upside-down/inside out. I think it looks nice in this Nani Iro linen.


That being said, it sat unworn in my wardrobe for quite a while. I struggled to find something to wear with it, but it suddenly became a lot eaier once I tried out a few skirts and bought myself a navy cardigan.

Bye

Wednesday 21 August 2019

The Zip Fly Controversy

Now, let's start with a disclaimer. I'm not that keen on drawing attention to someone else's crotch. This is not a post a draft lightly. But it is an issue that has been bugging me for months. And I think I finally found a perfect illustration thanks to Tilly and the Buttons.

So what's the issue that's got you all fired up, K?

When I started making trousers, I was so sure that every stitching line had to be as close to the centre front seam as possible. The fold of the overlap had to be at centre front, the topstitching had to be at centre front, the centre of the zip had to be at centre front.

So, on various pairs of trousers/jeans you (I) can see topstitching from the underlap, or (heaven forbid) the actual zipper tape.Because it's impossible for all of those things to occupy the centre front at the same time.

Recently I've been worrying if it's only me who has this problem. As if everyone else in the world can have perfect zippers and matching topstitching. And TATB, on their beautiful demo photo, show exactly the problem I have been moaning about to myself. Bless that pink stitching line.

Okay...so...?
If you're in the niche that cares about your you-made clothes looking as good as possible, you will care. That snazzy contrast topstitching won't draw attention where it has no place to be. That surprise coloured zip will remain a surprise. You will finally be able to fix that odd sense of draftiness where your zipper ends. Never again will you worry that it looks like your flies are open even when they're firmly closed.

I had been frustrated because I thought I'd gotten beyond the issue, until B's Quadra's started showing the same symptoms. I followed the instructions on the Quadra fly. I was prepared to come here and spout a load of rubbish about zip-fly conspiracies. I was ready todo a whole series on it. (We could call it The Zip Files...) but instead, I've checked some samples and my sewing books.

The DK Sewing Book - is an authroity on getting you started with a particular technique. Its lapped zip instructions warn that the folded bit of the underlap won't match the seam. It's not so clear on the zip fly instructions, and even assumes that these lines will be marked (has anyone ever seen that?).  In both cases, it's curious that it advises for the overlap to only meet the topstitching - not cover it/go beyond it. I think this is misleading.


David Page Coffin's book Making Trousers for Men & Women has a whole chapter on flies, but doesn't seem to go into this point in detail. Mind you, I find that this book does everything backwards anyway (definitely worth buying+reading if you're interested). But even the front cover sample boasts a massive underlap. No way is the topstitching showing through at the bottom of the zipper.


I checked out some RTW pairs and almost all of them had the underlap at least 1mm behind the seam line. You need to hide the zip, not just cover it up with the overlap.


For jeans in particular, where there was visible topstitching on the crotch seam, the underlap fold was at least as wide as the topstitching there. The line of topstitching on the underlap has the illusion of carrying straight on down on one of the lines of seam topstitching.

The pair below illustrates this very well, but was by far the smallest underlap. Most underlaps were about 1mm - 4mm away from the seam line.


Formal trousers, however - seemed to be much closer to zero underlap. Is this a feature of smaller zips or dress-weight fabric? I have no idea.


So I'm not sure what to say now. I was sure that there would be one "normal" answer and it doesn't look like there is. My top tips for getting a good looking fly are: 1) the fold line of the overlap shoud be at centre front and 2) the underlap should extend underneath the overlap so that everything is hidden.

K

Sunday 21 July 2019

Do you wanna know how I got these scars?

Halloween rolled around and an invite to a party rolled in to B's inbox (or whatever the social media equivalent is). I don't get invited to parties, you see. But B gets quite a few! It's socially acceptable to have a costume for these kinds of gathering and he was searching his brain to find something quick and easy.

Suddenly the thought of a blazer he got for the 2017 office Christmas party popped into his mind. velvety and purple. Blue shirt? sure. We've got the makings of a Dark Knight Joker. But no green waistcoat. And the party's tonight!

Here's where Katrina jumps in. Custom green waistcoat fromscratch in a couple of hours? Well, I had no other plans for the day. Best get the fabric scissors out.


The Pattern

I hacked the Thread Theory Newcastle (M) for this. There was lots of "fit as you go" and I did make a muslin, but it was always a slapdash job. I redrafted the neckline, but with hindsight should have done so differently. It sits very wide on B's shoulders and communicates more "style" than "classic".  In fairness, I think I fell in to a common trap.

I used the pattern because it was already printed and in the right ballpark. In future I'd like to use an actual pattern and some proper design details. Thread Theory has the Belvedere waistcoat, doesn't it?

The Fabric

All scraps, which is partly why I was keen to volunteer for the waistcoat. The green is a baby cord from Edinburgh Fabrics, leftover from some trousers. The oriental fabric is an old gift and most of it lives on the inside of my molly waistcost. The plain blue came from my JP trip, though I'm not sure if I've used it before. It was good to dig all of this out of my stash.

I can't decide if I got the oriental pattern upside-down. I was sure I was right when cutting out, but now it looks like the fans are the wrong way up - perhaps they're not supposed to tumble down?

Construction

All of the construction was fast and dirty really. I added slits to the seams to allow a bit of costume flexibility. The buttons came from B's stash. I think it turned out pretty nicely for 4 hours of work (though I bet Patrick and Esme would say otherwise)

Bye.

Tuesday 9 April 2019

Shirts. Just Shirts.

Until autumn 2018 I had about 5-6 work shirts in heavy rotation, but they've been beginning to look a bit tired. I had to get rid of one as the fabric had completely worn out across the back. Still, after 10 years of use, I was pretty pleased with its shelf life.

I've been feeling an itch for some new work shirts in my life for a while too, so it was good to finally make some. In fact, I've been planning this for so long, the fabrics were all pulled from stash and I basically had buttons already available for the most part. I made 2 desgns and will talk about each in turn.

Tailored shirts: Charles Tyrwhitt RTW Copy

I've had a crisp, white tailored shirt from Charles Tywhitt since my first attempts at joining the labour market. I thought it was the most beautiful and elegant item of officewear imagineable. Other people probably didn't think so.

Back in 2015 when I was on a RTW-copying binge I took this shirt from my wardrobe, covered it in Frixion pen and tried to take a pattern. All things considered, it went pretty well but the shirt stayed stuffed in a bag for 12 months and the pattern didn't progress beyond rough drafts.

I finally brought the shirt back in to service but it was no longer the apple of my eye. The fit is not as exquisite as I would like, it's cut incredibly high into my armpits and struggles to remain tucked in if my trousers are below my natural waist.

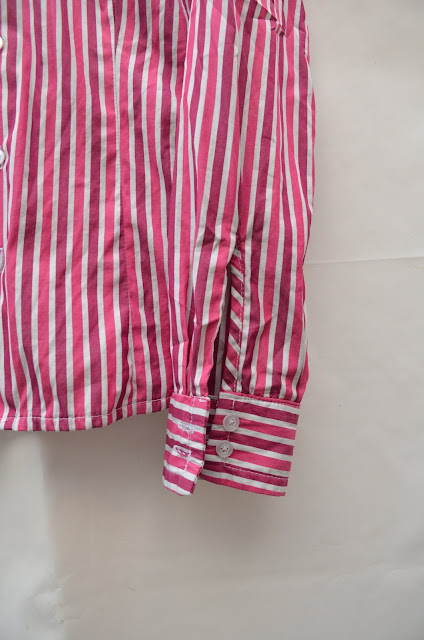
But still I had the undeveloped pattern. This was the last project to clear from my crazy 2015 backlog and I had to see it through. I trued the pattern as much as possible and sewed it up. Now I have a new bold pink shirt and a new ubiquitous blue stripe one.


The pink fabric was a gift many moons ago. It came from Truro Fabrics or Stone Fabrics, I can't remember which. The interfacing was from William Gee. This was my first time using their K10 product and it's not quite what I'm used to. I need to spend a bit more time working with it to get best results.

So let's talk about construction. Despite trueing this as much as possible, there were still a few tricky bits where it wasn't perfect. Because I wasn't prepared to iterate this until it was right, I decided I was happy to live with it. This gave me some problems during construction, but I tried to make it work so the final thing would look okay. For example, the collar stand and collar weren't quite symmetrical and it's very easy to be bothered by the pink stripes if they don't look even. It's less of an issue on the blue shirt, so that one has fewer "corrections".

One detail I love is the bias binding on the sleeve slit. This is a detail I copied from the original and it's so fun! It looks like a candy stripe! Those of you who know me will know that I always roll up my shirt sleeves, so why even bother adding proper cuffs?? I have no idea. Maybe that bit just had to be right.


So these are in heavy rotation now. It's an uncontroversial design and it's basically passing in the office without comment.

McCall's 7360: Grandad Collars Galore

I've fallen out of love with the Wiksten Tova and have been searching for a replacement grandad/mandarin collar shirt. I think I was also keen during 2018 to push the Moira Skirt into circulation, and I thought it would work well with grandad collar shirts. The McCall's pattern fits the bill and popped up at just the right time.

It has been a while since my last tissue pattern. The size chart indicated an 8 at the bust, and 12 at the hips, but after checking the finished garment measurements I made a straight 6.


I like the pattern generally but it has a couple of weird details that I don't like. Firstly the bust darts are a bit too high, but the design is so loose and I'm so flat chested that it doesn't really matter. The shoulder seams sit slightly forwards, typical of shirts with yokes, but they sit quite close to my natural shoulder line, so I wonder if it's just pulling backwards. If I make this again, I may move the darts down a bit so it looks correct.

The main thing that bugs me is the two-piece full length sleeve. It looks like the only reason why this sleeve is in two pieces is to avoid cutting a slit for the cuff. You just leave a gap in the seam! The instructions say to to use the leftover seam allowance from this area to make a tiny hem. I guess this would work but it feels a bit funny to add a whole seam there just to provide some seam allowance to finish. You know I'm not very good at following the instructions so I used bias binding on the sleeve slits, like on the tailored shirts.


As always there was a lot of hand sewing in the instructions so I tried to find a majority machine finish too.

The fabric is linen for both shirts. I really lik the rumply-linen look for this style. It helps to mitigate some of the visual impact of a loose style on someone with my frame. I enjoy sewing with linen but rarely like the finished project as soon as it's done. Linen projects always look better after their first wash, so it's important to be patient during those first few wears.

The striped linen is pretty heavy and comes from Momo during my Tokyo shopping trip. It always reminded me of baseball, but I can't remember the original plan for it. The plain linen, I don't remember. It has been in my stash for a while. Perhas it came from Goldhawk Road, maybe around the same time as the blue stripes for the tailored shirt above. Both of them are neutral so I can get away with wearing them with almost anything.


The buttons are a bit more "happy go lucky" than the buttons for the tailored shirts. I really didn't want to go out and find new ones for these shirts so I tried a few from the stash. I had enough little pink ones for the centre front bit of the plain shirt, but not enough for the cuffs. I used some spare hammer-in snaps, but I doubt anyone will notice. The beep blue buttons are a lot heavier, leftover from the fluffy Newcastle. They tread a very fine line between 'tailor's window chic' and clown-ly. As always, if you wear it with confidence it won't matter.


So that's it for 4 new shirts. They're in rotation and I expect they'll see me through for quite a while.

Bye

Sunday 17 March 2019

Excuse me, if I Mei

I bet you thought I was done with the Overwatch puns! Well, sorry buddy, I'm not in control of that anymore.

This project has to be one of my fastest to go from 'on the bolt in the shop' to 'finished item'. I bought the fabric on 14 Aug 2018 and sewed it up over the bank holiday weekend. Under a month isn't bad!


The Pattern: Burdastyle 12/2012 #139 Hooded Sports Jacket

This is the Hooded Sports Jacket from Burda 12/2012. I've used quite a lot of patterns from that issue and I've been coveting this one for quite some time. This is just a really good issue for jackets, the photos are all fun and fresh, but the style lines for the patterns are very similar to many core RTW styles. The gold dress on the cover may be showstopper but the other patterns absolutely make this issue.

I made a few adjustments to help both style and fit:
  • Lengthen the hem by 1"
  • Cut the sleeves to a regular length. The pattern has extra-long sleeves which are folded up to form long cuffs.
  • Add a zip shield
  • Take a wedge from the hood. The original is huge, and this one is still too big really. 
  • Convert pockets to zippered inseam pockets

The Fabric

During the Edinburgh Fringe I took a stroll to Remnant Kings over at Bonnington Road. I wandered all around the top floor and saw soft shell fabric in the flesh for the first time ever. Cue the pounding chest and sweaty palms. There were 2 gorgeoups plain colourways (navy/red, grey/green) and 2 patterned ones. Patterened soft shell! What magic!


The 2 patterned fabrics were extra large blotchy dots: one in navy/peach and one in a series of icy blues. Oh, I was in love with all 4 bolts. I spent a good long time pacing up and down the shop imagining all of the possibilities. Yes, the plain fabrics were racier, more svelte, elite. The prints would be great for kids. They just looked like snowballs, trailled by dust as they fly through the sky; raindrops that hang on your window; romantic pre-Christmas sleet; moons hanging in a frosty sky; fizzing bath bombs; blurry watercolours on a brand new canvas. I couldn't leave them behind.

And of course, we all know who fires snowballs.

I reasoned and argued with myself and eventually walked away with something completely alien to my normal colourway. It was beautiul, but was it right? I showed up to my theatre shift giddy and distracted. What had I done?

The Construction

The fabric may be fairly waterproof, but the construction was definitely not idiot-proof.


After we got back home I rooted through my notions and tried to push the blues and greys theme as far as it would go. I found the reflective tape B got me as a gift, and decided to incorporate it into the jacket (road safety, you know). Sewing the reflective tape was very challenging as I wanted to sew some sort of reflective flat piping into each seam, but the needle did not like it at all. So I had to rethink. The answer was a mock flat fell seam where the tape is captured between 2 garment layers, folded to one side and then top-stitched (and trimmed). This caused issues as it had to be symmetrical and I kept stitching it incorrectly (i.e. the tape folds to the wrong side), but I eventually got through it. I chickened out on using reflective tape for the jacket's pockets. It looks fine.

For reasons I can't explain, I poured a lot of effort into pattern matching this fabric when I was cutting out. It seemed important at the time, though I'm not sure why. Naturally, because of the shape of the princess seams, there's usually one key snowball which matches and then the others are a bit off. I really love spotting the matching snowballs. Especially the ones over the pocket openings.


The cutting was broadly successful but some of it went to waste when I screwed up the seaming and had to cut the seams out (unpicking leaves holes). It still turned out pretty nicely.

I used variegated thread for a lot of the topstitching. It was in my stash already, andoverall one of the best colour matches for the fabric. It's a very difficult blue to colour match, and it's very easy to fall back on the grey tones, so I was constantly trying to balance that out. Luckily the fabric doesn't fray so they grey overlocking was minimal.

A quick few notes about the centre front. The zip is a lot chunkier than I would have liked but the pattern calls for a really odd length of separating zipper. The closest thing I could find in a shop was this one, so in it went. I sewed the knit binding (from my Japan trip) and the zip all in one go fron the hem of one side, all the way around the hood, to the hem on the other side. Boy, that was h*cking stressful!


This jacket is supposed to be my new throw-on bundle up jacket. I wear it nearly everyday, it stuffs down nice and small, and the zippered pockets make everything so secure. It's good and waterproof, fairly windproof and great for layering. I expected to be wearing a different coat over winter, but this one had surprisingly stood up to every element thrown at it so far. It is so much easier to bundle extra layers under this jacket (including hat + scarf) than it is to switch to a bigger coat. I am genuinely surprised.

I'm hoping I can get at least 1 year of wear from this jacket. It is being worked very hard.

Bye

Sunday 3 March 2019

Imposter Syndrome


Grey workhorse trousers, (unblogged) blue stripe tailored shirt,  (unblogged?) minty green jumper

I wore this outfit on an evening out with colleagues recently. It wasn't a fancy evening out, just an 'office to pub' job. I got home late and had to take this mirror selfie before bed because I was surprised at how uncomfortable I felt.

I made all of it. It is, by definition, 100% completely and honestly me.

The fit is fine. Granted, the pockets in the trousers are falling apart, which is quite annoying. But there is nothing physically wrong with these projects.


But I don't recognise myself. I look so meek and generic - which is disappointing when women in my line of work generally have some stylistic freedoms.

These clothes reflect the most neutral and generic components of my wardrobe. As sewing projects they were supposed to help me blend in with the rest of the world. It's no accident that they look quite masculine. I made two of the 3 pieces within the last year.

I've made clothes to help me act like I belong in my workplace. I have identified what I need to impersonate to survive, and made my costume as needed. But now I don't know if I'm still impersonating, or if it's genuine.

How did I get here? Why have I done this? And how do I break this habit?


Saturday 23 February 2019

The Bamboo Dress - Vogue v8875

See, sometimes it’s worth being reminded that we shouldn’t be left to be masters of our own taste – because we’d leave so many gems undiscovered. I think v8875 is an absolute gem and it would have slipped right under my radar if it weren’t for a friend.

About a year ago, she approached me to make some bridesmaid dresses and picked v8875 as one of the patterns (the other one being V1172). That was the beginning of my little love affair with the design and I knew I needed my own version too. Here we are:

a cotton summer dress on a coathanger


So what makes this pattern so special? The skirt is relatively long, straight and plain. So it’s a good opportunity to put your own stamp on what happens below the waist. On the bridesmaid version I pegged the skirt and added a vent. On my version I drafted a massive high-low circle skirt (with pockets).

The pattern is unlined with facings, which makes it lovely and easy-going if you like the casual look. Otherwise, it’s relatively quick to line if you prefer.


The true magic is in the bodice. The bodice is a boat neck, cut-on sleeve top with darts, side panels for shaping and 4 (yes, 4!) beautiful inset corners. I’m not sure what sort of voodoo makes it fit together perfectly, but it does. It’s just enough of a sewing challenge to keep dressmaking interesting – let’s face it, making dresses can be a bit dull after a while. The pattern is probably a bad choice for a beginner but great for someone with intermediate skills.

You know I love a good boat neck and cap sleeve combo, so I’m clearly going to be biased in favour of this pattern, but I also think the bodice offers very elegant shaping and proportions for many different shapes. You could make the seamlines the feature of the dress or downplay them as a surprise for anyone who wants to take a closer look. The choice is yours!

So let’s talk adjustments. I desperately wanted to believe that this pattern would fit me straight out of the packet, but after a muslin or 2, I decided it really needed a small bust adjustment (often known as an SBA). For those of you not in the know, many patterns are drafted to a particular cup size and if it’s not the same as yours, you may need to make an adjustment before cutting the final fabric.

Luckily for me, By Hand London made a tutorial a few years ago on adjusting the bodice or the Anna Dress, which is a very similar shape. So I loosely followed that.

The pattern is branded as vintage, though I think the sizing/draft is fairly modern. It does keep vintage techniques and instructions, which may not be to everyone’s tastes. I like the facings, but you could hem or bind the edges just as easily. Similarly, the optional belt in self-fabric is not a basic rectangle, it is subtly curved so that it sits level on your waist. I can’t remember if the pattern includes an internal waist-stay, but it’s probably optional as well.

If you are not married to vintage construction techniques, I’d recommend ignoring the instructions for the inset corners. I achieved nice results by:
  • Fusing a small patch of interfacing to the wrong side of the bodice at the V-points
  • Staystitching the points on the bodice and side-bodice pieces
  • Clipping up to the V where necessary
  • Matching the staystitching lines, attaching pieces together and then pressing.

Fusible interfacing and staystitching. You can overlock the SA afterwards


If you are married to vintage construction techniques, good luck, you probably don’t want my advice.

For my Bamboo Dress I used Nani Iro Rondo SAAA SAAA double gauze from my Japan trip. It wasn’t my first choice for the fabric-pattern pair, but I think they work nicely together. I barely had enough to complete this dress and ended up having to shorten the front to make all of the pattern pieces fit. It was worth it though.


I seem to have a thing for irregular stripes (remember the Anna dress? Or maybe the Drape Drape monstrosity?). The thing is, yes, they are supremely beautiful. I think they bring a sense of life and movement to a design principle that can easily risk being strict and mechanical. They're a devil if they're not on grain though. And they're a devil to pattern-match. So, I did my best on this dress for "pattern consistency" rather than "pattern matching". Hopefully the dense bits and the same shades of green are in vaguely the right places.

That’s about it for now, hope you like it

K

Saturday 26 January 2019

2018 Xmas gifts, looking back on The Year of "Just Because" and announcing 2019

Autumn 2018 had been very busy. On one hand, I don't quite understand how I managed to make any Christmas gifts at all. On the other hand, I've got a bad case of the should, coulda, woulda and feel a bit disapointed for not delivering more (better) gifts. This is why crafters start in April!

In case you're curious, I oversubscribed my evenings/weekends and then found myself reapplying for my job in December (again) (I got it!), and so any spare time/attention got sent that way. Somehow the gifts got squeezed in.

Little t-shirts for Little N

The early deadline for me is always the past posting date to Japan. I have to get P, M and Little N's items sorted as quickly as possible because it's easy to get caught out.

I've been a long-time admierer of Madeit Patterns but have always stayed away from buying the kids patterns until Little N was a bit bigger. I always thought that they were for slightly bigger, older kids. But on a  recent idle browse I noticed that the patterns went all the way down to 2Y! Very exciting! I know someone who's 2Y!

I checked the sizes with P and it seemed like Little N would actually be good in the 5Y size so I made up the Matrix Polo and Kite Fold Tee in 5Y and hoped for the best. I'm not good with kids sizing. He can always grow in to them.


I liked working with the patterns and enjoyed reading the instruction booklet too. The paterns helpfully come with a colour guide/fabric guide so you can get the same colour distribution as the product photos. I also printed the technical drawings so I could plan which colours should go where. There are also a few jokes and quips in the instructions, and some really nice illustrations. Yes, I know I'm not normally a follower of instructions but I do at least believe in reading them through before starting!

The fabric is a classic 95% cotton 5% elastane jersey from Girl Charlee UK. I chose the colours for a bit of a Union Flag/Team GB look. M is a bit of an anglophile so I'm hoping she appreciates it, despite having a bit of a black/white colour palette for herself (much less wacky than mine!). I think Little N will look handsome in anything so it's no use asking me.

I made one alteration, switching the zip on the Matrix Polo for press studs and a CF placket. I hope N gets another one of these shirts because I'd like to refine the placket a bit more.

Glow in the Dark PJs

When you make stuff, it's only good and proper to go slightly nuts whenever glow in the dark fabric pops up in the shops. Anything less would be rude.

So I found an excuse to buy some: one with stars and one with dragons. And some friends got PJ sets making use of the fabric (and no prior warning). Both light grey fabrics are glow in the dark. The fleece and dark jersey are both normal fabrics.

Butterick 5432 and Madeit Patterns Strip Tee

Butterick 5432

Burda 04/2016 #139 in star fleece

Burda 04/2016 #139, Thread Theory Strathcona Henley

I realise that I didn't get any images of the fabric actually glowing. Ooops. Anyway, the glow fabric I used was this dragon design and this plain/star design. They do actually glow, promise.

Patterns used: Butterick 5432, Madeit Patterns Strip Tee, Burda 04/2016 #139, Thread Theory Strathcona Henley

Grandparent Cosies

For some reason I'm constantly worried that my grandparents are at risk of freezing. So I made them some warm clothes again. I'm totally guessing their sizes so it's unbelievably difficult to make anything complicated. Even if I know my grandad prefers tailored trousers over joggers, I can't even begin to guess how to do them for him. I was proud of getting the size vaguely right for my nanny's fleece jacket. I know people shrink in later years, but she's still a good few sizes bigger than me.

I used fold over elastic on the purple jacket, so it's a bit wobbly as I didn't really have enough available but needed to finish edges. I think it works well enough. I added one of those nice shields at the top of the zipper to stop things getting scratchy.

Newcatle cardigan with small collar and wood-effect buttons

Burda 04/2016 #139

Burda 12/2012 #116 jacket


Patterns used: Burda 04/2016 #139, Thread Theory Newcastle, Burda 12/2012 #116

Jeans for B

I've been meaning to make a new pair of jeans for B for a very long time, but they finally got made!

I bought the fabric from Goldbrick Fabrics at Xmas 2017, so these have had to wait a whole year before being made up. It's a denim with a coloured wrong side, this one is red but I also picked up a beautiful green one. The green will give me a pair of jeans hopefully at some point. Goldbrick had the denim available in several colourways and I think the yellow version has popped up online at times over the last year. I haven't seen any more of the red or green yet so I'm glad I got them when I did. This is why it pays to shop physical sometimes!


Annoyingly the red is just printed over the white threads, instead of being cleverly woven in. I did some abrasion tests when I first got the fabric, hoping that the colour would show through if I ripped/distressed the jeans. I saw some fancy designer jeans do this (maybe True Religion?) at some point in 2016/17 and thought it would be good to replicate (a bit like this). It turns out that distressing the red side allows the dark blue colour though, but distressing the blue side shows the white threads. Shame.

It's a good thing we waited to make these because B's measurements flucctuate quite a bit and the old adjusted Jedediah pattern would no longer be suitable. I was prepared to set off on a new bunch of pattern adjustments to the Jeds pattern but then Thread Theory announced the Quadra Jeans - which apparently had more room in the thighs than the Jeds (one of the key adjustments last time) so I was quite keen to give them a whirl.

We took B's measurements and chose a size. According to the measurement chart we would have plenty of rise to sit high-ish, or at least as high as his sample Uni Qlo jeans. The finished jeans seem to sit fairly low, and definitely lower than the product photos led me to believe. This might just be a result of where/how B likes to wear his jeans. Without being too personal about it, the back sits quite high and the front dips down, similar to my Helsinki jeans (and possibly similar to maternity jeans). 

I think the Quadras are [sort of] drafted to sit level all the way around the waistband. If you were to see B's preferred jeans style on the body from the side, the waistband would be diagonal, not horizontal. So I'll probably made adjustments for future versions. Also, I will see how they change over time - jeans need to age a bit before you can properly judge them. 

I cut them fairly generously because the fabric has no stretch and will probably shrink over time. Also, the previous trousers/shorts I've made for B all became too small, so I'm trying to future-proof these a little bit.

Also, you may have noticed that this was the only Xmas gift I made where I wasn't completely guessing the recipient's size. I even made a muslin!

I used a red/gold colour scheme with a side-serving of rainbows (Always show them you care with a side-serving of rainbows). This is a mix of twin-needle and single needle detail. I really liked the pocket topstitching samples that came with the pattern and made one of those designs. I spent absolutely ages switching needles and threads on this project. Ouf.

My super high-tech method for tracing the pocket stitching designs.


Pocket topstitching in progress

Reverse side of the twin needle yoke. I think it looks pretty fun!

Pocket bag and coin pocket

Fronts in progress and a side-serving of rainbows

Wrong side of fronts in progress. And my front.


I also liked the instructions for the fly. Morgan got me through my first ever zip flies so it was fun to try a new style.

That's it for Xmas gifts. Special shout out to Empress Mills from which I purchased a lot of fabric (first time customer). You weren't lying when you said that fleece was substantial! I'm lucky to have quite a bit of tasty fabric left over to fuel my makes well into 2019.

2018 Roundup

At the end of 2018 I felt like it had been a year of slow progress and falling slightly short of (my own) expectations. A lot of my plans and goals are still very much "in progress" - but they are happening! I am still eternally grateful for my health, job, friends and family. Let's keep it up, but let's get back to makery.

So, The Year of Just Because was largely about trying to rediscover enthusiasm, passion, excitement and joy in my makes. Also, about pushing forward into silly makes, indulgent makes and great makes. I think it was also partly about re-discovering the emotional rollercoaster of makery - especally the high points. So, how did I get on?
  • I got an overlocker! I have loved working with 2 machines and I'm really glad I got one at the start of the year. We're buddies now.
  • I danced my heart out and kept healthy. My diet sometimes gets a bit crappy, but I loved cooking, eating and growing food. The monster tomato plants got a bit much in our back garden, but they were damn tasty.
  • My makes went on stage at Sadler's Wells. Dream come true. 
  • Daft gifts and crazy fancy makes definitely happened.
  • I developed a pretty Airtable to organise my projects. You have no idea.
  • I received a very generous haul of very pretty fabrics from India.

Just Because has allowed me to indulge a few of the crazier makes and idead in my head (see: dehydrated food). But it has meant that the number of ideas in my head has far outstripped my ability to make them. The balance between my regular scheduled of sewing, branching out into new projects and everyday demands has been stretched and disrupted. It's just that enthusiasm and indulgence don;t make good bedfellows with balance and moderation. I'm not sorry. But it's time to break this habit.

2019: The Year of Breaking the Habit

2018 did exactly what it was supposed to creatively. For 2019 I want to bring it in again. I am probably going to be full-on busy until Easter at least, and I need to expect to be time-poor. This means I need to find projects that give me the kick I need in a bitesize fashion.This might be taking projects more slowly, doing smaller/simpler projects or taking a step back. I love my long and complicated projects but I think investing 20+ hours in a project cannot be my expected norm this year. It's not my job, it's not my only hobby, it's not my total social life and I don't have that kind of time available.So, this year is about controlling the habits that could get me into problems.

  • I'm thinking more about cooking and baking. It's actually an activity with a relatively strong payoff vs time invested ratio. Plus, I really like food and would like to grow my culinary arsenal.
  • I've booked some Morley College courses for the early summer in beading, tutus and millinery. They're good for branching out and I think I'm going to enjoy having some structure and direction imposed on my makery.
  • B has given me some electronics kits which I may pursue. They look like a lot of fun.
  • I'm hoping for some holidays as well. This is the first time I'm considering not going to the Edinburgh Fringe and the idea of an actual week of holiday seems quite exciting.
  • Music, live theatre and learning are all important parts too.

I started the year by wiping out my queue, getting rid of the recycling pile and got a couple of tiny victories by reading an actual novel (a whole actual novel! I'm not sure I read any stories in 2018!), going on a trip, finishing a "chore" project and trying out some new recipes. Let's keep it up!

On the downside, a bunch of my office clothes have ripped since the start of the year (don't ask) and my dance mojo has also completely fled. At some point these things will be rectified, but I'm not forcing it.

Snoop My Stash

Since you've read this far, a stash update for you:


Loads of leftovers. Tasty, tasty leftovers.

Bye x