Hey y'all,
I've been working on
fitting recently, a large part of this learning curve was coming to terms with
the iterative nature of fitting and the fact that (despite what THEY tell you)
it's a very subjective assessment. All of the expertise in the world is no match
for a basic preference from garment to garment.
I'm developing an
almost unerring faith in patterns - if the paper is right, the seams will match
up. If the paper is right, it'll hang correctly. If the paper is right I will
be able to move unrestricted.
I'm also very aware
that fitting is an alien and scary process to people, both makers and
non-makers. Have you ever had that thought that something isn’t right with your
clothes, but you're not sure what? Have you ever tried to explain to the parcel
delivery guy why you're stood in your lounge in your bra, tissue paper and
covered in pins? Have you ever gone straight for something in your size only to
find out it looks awful. Probably all to do with fitting. In one recent muslin
session my housemate passed by and commented "That's a really interesting
peekaboo effect, what's it going to look like on the final one?" - before
having her hopes sadly dashed by the reality that we're just making extra space
for lumpy bits.
With that in mind, I
thought it would be useful to share some recent adjustments and the rationale
behind them.
Janet
I used the bodice of the first Janet dress to make several new dresses, but over time I realised the fit was really off. This
second time around I've gone a bit freestyle with transferring adjustments to
the flat pattern from the muslin. I'm trying to stick to vertical and
horizontal adjustments wherever possible because they're easier to understand
and keep track of. No FBAs, diagonal lines or adding random darts for me. I
also try to minimise any changes to the actual seamlines - slash and spread as
they say.
I suppose
the main things I had to do to the pattern was to adjust for rounded shoulders,
a narrow swayback and (amazingly) an
adjustment to the upper chest.
A lot of these adjustments seemed to just be
moving shaping out of one place and moving it to another. It seems silly but a
couple of significant changes in fabric actually cancelled each other out on
paper!
I've done
some sketches to show how I interpreted
a few of the fitting issues and justified a few of the adjustments.
Rounded
shoulders and sloping shoulders


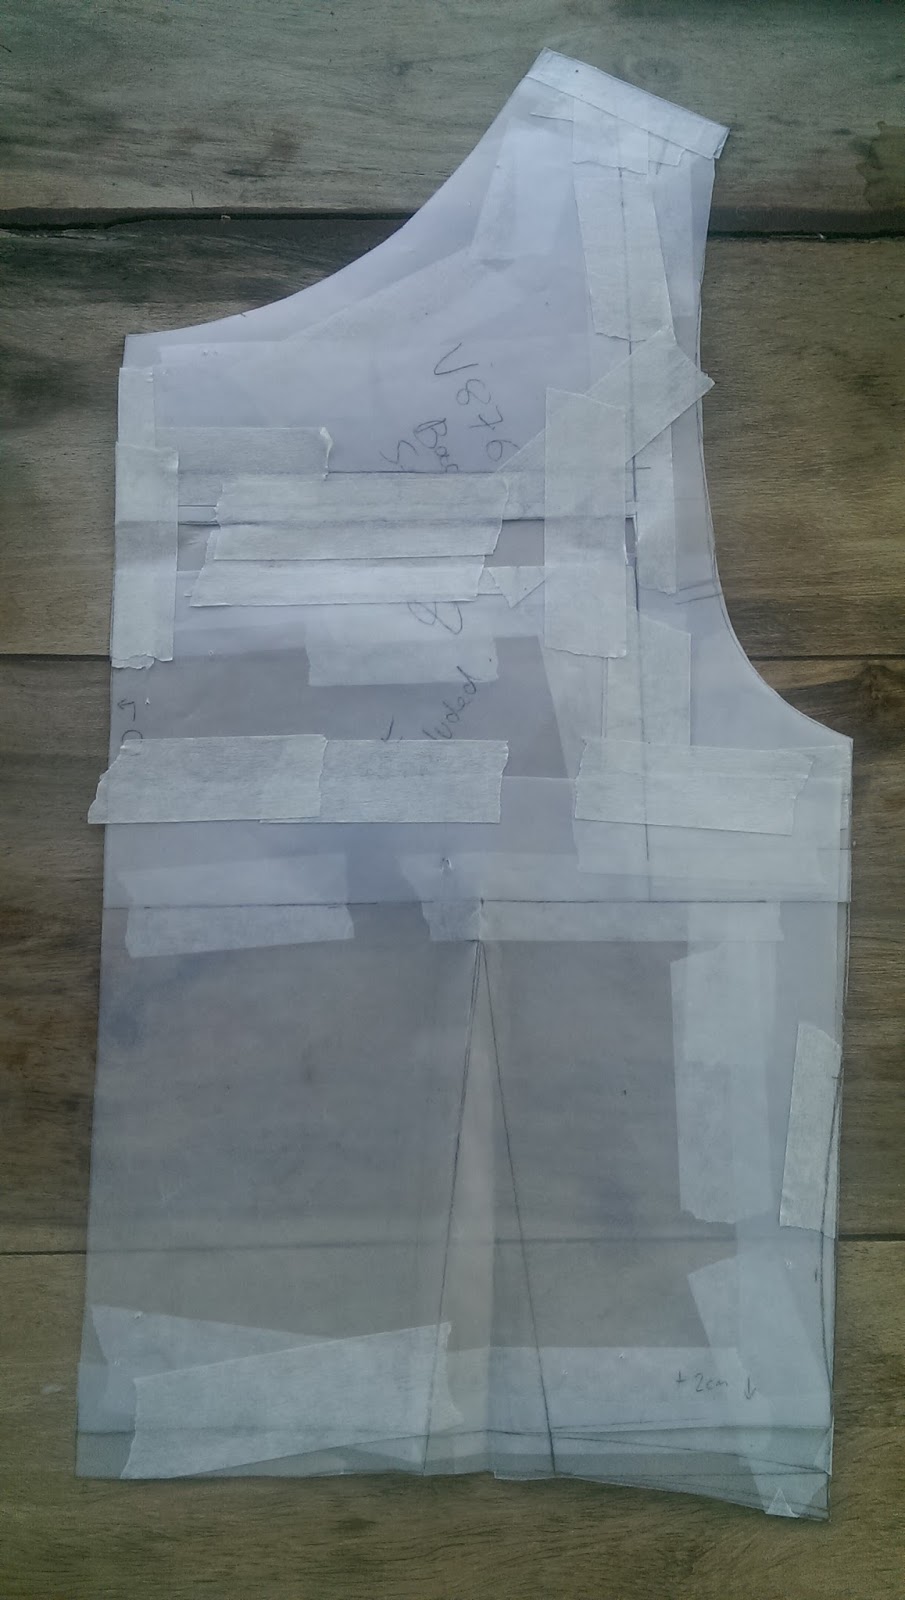
Okay, so I needed to add length at the upper back in the centre, and I needed to raise the inner edge of the shoulder so it slopes more. I squared across from the centre back (CB) to halfway along the shoulder, then raised it until the slope was correct.
This still wasn't enough space at CB, so one the first adjustment was taped up, I cut slightly below it and I extended the vertical line down into the side seam and added more space at CB as appropriate.

Swayback
adjustment
When the pattern was straight out of the packet, there was some excess fabric in the small of my back. By making the adjustment above to the muslin, this was made WAY more extreme. What I need to do here was remove fabric so the waist hits the correct place. The amount taken out would integrate the shortened body and and the swayback issue.
Apparently my only photo of this is when it had been taped up again. See the horizontal line below the armhole? There you go!
Upper
chest adjustment - Front
Very similar to the adjustment I made to the back. My cup size was about right or a little small for the pattern. I split the length added across a sloping shoulder and a side seam below the armhole.

Below are some fast and dirty muslin shots - after almost all the fitting tweaks had been adjusted. The only thing left is that it was too long:


Below are some fast and dirty muslin shots - after almost all the fitting tweaks had been adjusted. The only thing left is that it was too long:

Kaisla
These
adjustments were really minor, the sleeve wasn't long enough, the shoulders
needed a tiny adjustment after adding shoulder pads, the swayback issue is
exactly the same as above. B helpfully pinned the muslin and it really visibly changes the drape of the jacket.


Above is the jacket straight out of the packet with no adjustments. You can see the top of the shoulder is collapsing a bit, and the middle at the back is a bit flouffy. At first it looked like we could fix it by taking some vertical room outside up the princess seams (like vertical waist darts). Didn't fix it.

Here you can see the tiny shoulder adjustment, as well as the actual fix for my swayback. Take out a horizontal amount, above the visible problem area. This is level with the base of my shoulder blades.


See how much better that looks? And you know the rest of how the Kaisla turned out.
I have
also been working on fitting some jeans too. Once V3 is made up, you'll get a writeup.
K. x.
No comments:
Post a Comment