Let's get the music thing out there as soon as possible:
It's not everyday that you become an auntie for the first time. I really think that such an important arrival requires a very special make. After all, you only get 1 first nephew!
Little nephew (LN) is on the other side of the world and so I didn't want to give him something he would grow out of very quickly. Oh sure, he will have some clothes sent his way at some point but I wanted to give him (and the family) something special and very important in the first off: a teddy bear.
It breaks my heart to see adult-only collector bears designed to sit in glass cases forevermore. Teddy bears should be loved and and carried on adventures for a long time. The lucky ones become friends, sages, minions, mascots, informants...for many years. I really wanted to make sure he will have a gorgeous bear to keep him company.
I used the Lekala #3050 free teddy bear pattern, size 1 and a couple of minky/cuddlesoft fabrics* from Plush Addict. Though I placed a huge fabric order with them in the Black Friday sale, absolutely nothing I needed was discounted. It's always the way, isn't it? The stuffing is from Hobbycraft, the eyes were from TP Textiles (which is brilliant if you want random notions at exceptionally low prices). Everything is loose and stored in jars. I picked up a few sets of eyes as I wasn't sure which ones would work best.
I made a practice bear as well. The pattern had so little information about the finished product, its requirements for fabric/notions and how to put the thing together that I was completely running blind. I bought extra eyes because I didn't know the size of the head, and had to keep sending people to Hobbycraft for extra stuffing. For anyone else planning to make this pattern, I hope the notes below are useful.
- The finished photo on Lekala's site (blonde bear) is completely inaccurate. Head, arm, and feet all have totally different seam detail. The belly is also very long and slim in the pattern. The two sets of user photos are more illustrative, but don't give an indication of scale or size. The two below are size/scale 1.
- The instructions are sparse, and the actual pattern pieces seem to be labeled in Slovenian. In the first instance, the snout looks very pointy and it felt like something had gone wrong. It's absolutely correct, and Sew Joyful has a lot of good guidance on shaping the face of the bear.
- For v2 (red bear) I made the belly fatter by redrawing the CF seam line between the top of the leg and the top of the armhole.
- For v2 (red bear) I also made the arms longer and fatter as they looked a bit scrawny on v1 (green bear). The outer and inner pieces also didn't seem to match in the original pattern, so v1 has some gathering around its paws. By correcting and modifying the arms, I also managed to make the belly a bit shorter.
- For size 1 the bear was approx 50cm tall. I used approx 750g stuffing for each bear. One is firmer than the other.
 |
| Look! It's a little cloud! |
- The seam allowance guidance seems very confusing. I treated the pattern as having no seam allowance and added 1cm to all edges.
- The eyes are VERY close together in the pattern, I found that having them wide-set at the edge of the snout was a good look, like on v2 (red bear).
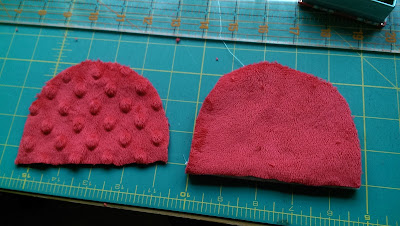
- I cut a layer of wadding for the ears
- The notches on the pattern are very good and meet up perfectly with corresponding darts/seams. I needed to rely on them for v1 (green bear) and was beginning to completely mistrust the pattern. I was wary of the notches, but was glad they were such effective reference points.
- I made up an order of construction that seemed sensible, if you're an intermediate sewer, you should be able to figure it out, but Sew Joyful will probably have some good generic advice as well. For v1 (green bear) I just started with the most obvious bits and hoped the rest would slot into place. For v2, I made the head and body separately, then joined everything together and pulled everything through a hole in the centre back.
There's not much that scares me in the sewing world - fluffy fabrics, shifty georgettes, monster sizes, complex patterns, fly fronts and zipper - none of them will draw sweat from my brow. But eyes on a soft toy are scary! They are so important to the project's personality (and overall success), but you have to wait until the very end before cutting a hole squarely in the face of the bear to install them! Oh I was very worried. But they both turned out so beautifully.
The two bears are yet nameless and their personalities not yet fully formed; they seem ready to go out into the world. The grandparents have adopted v1 and they seem to quite like it. I hope LN loves v2 and they keep each other company over the years to come.
K x
*Doesn't that fabric name just make you feel ill?? Bleurgh.
K x
*Doesn't that fabric name just make you feel ill?? Bleurgh.


No comments:
Post a Comment